

Quick Answer: To remove mould from leather, you need: gloves, mask, soft brush, No-Mould Leather Cleaner, microfibre cloths, and Leather Care conditioner. The process takes 30-45 minutes active work plus 24-48 hours drying. Step 1: Dry brush loose mould outdoors. Step 2: Clean with No-Mould Leather Cleaner on cloth (never spray directly). Step 3: Dry completely in air-conditioned room (6-12 hours). Step 4: Condition to restore protective barrier. Step 5: Store with anti-mould patches to prevent recurrence. Success rate: 95% for surface mould caught within 2 weeks.
Before You Start: Is DIY Right for You?
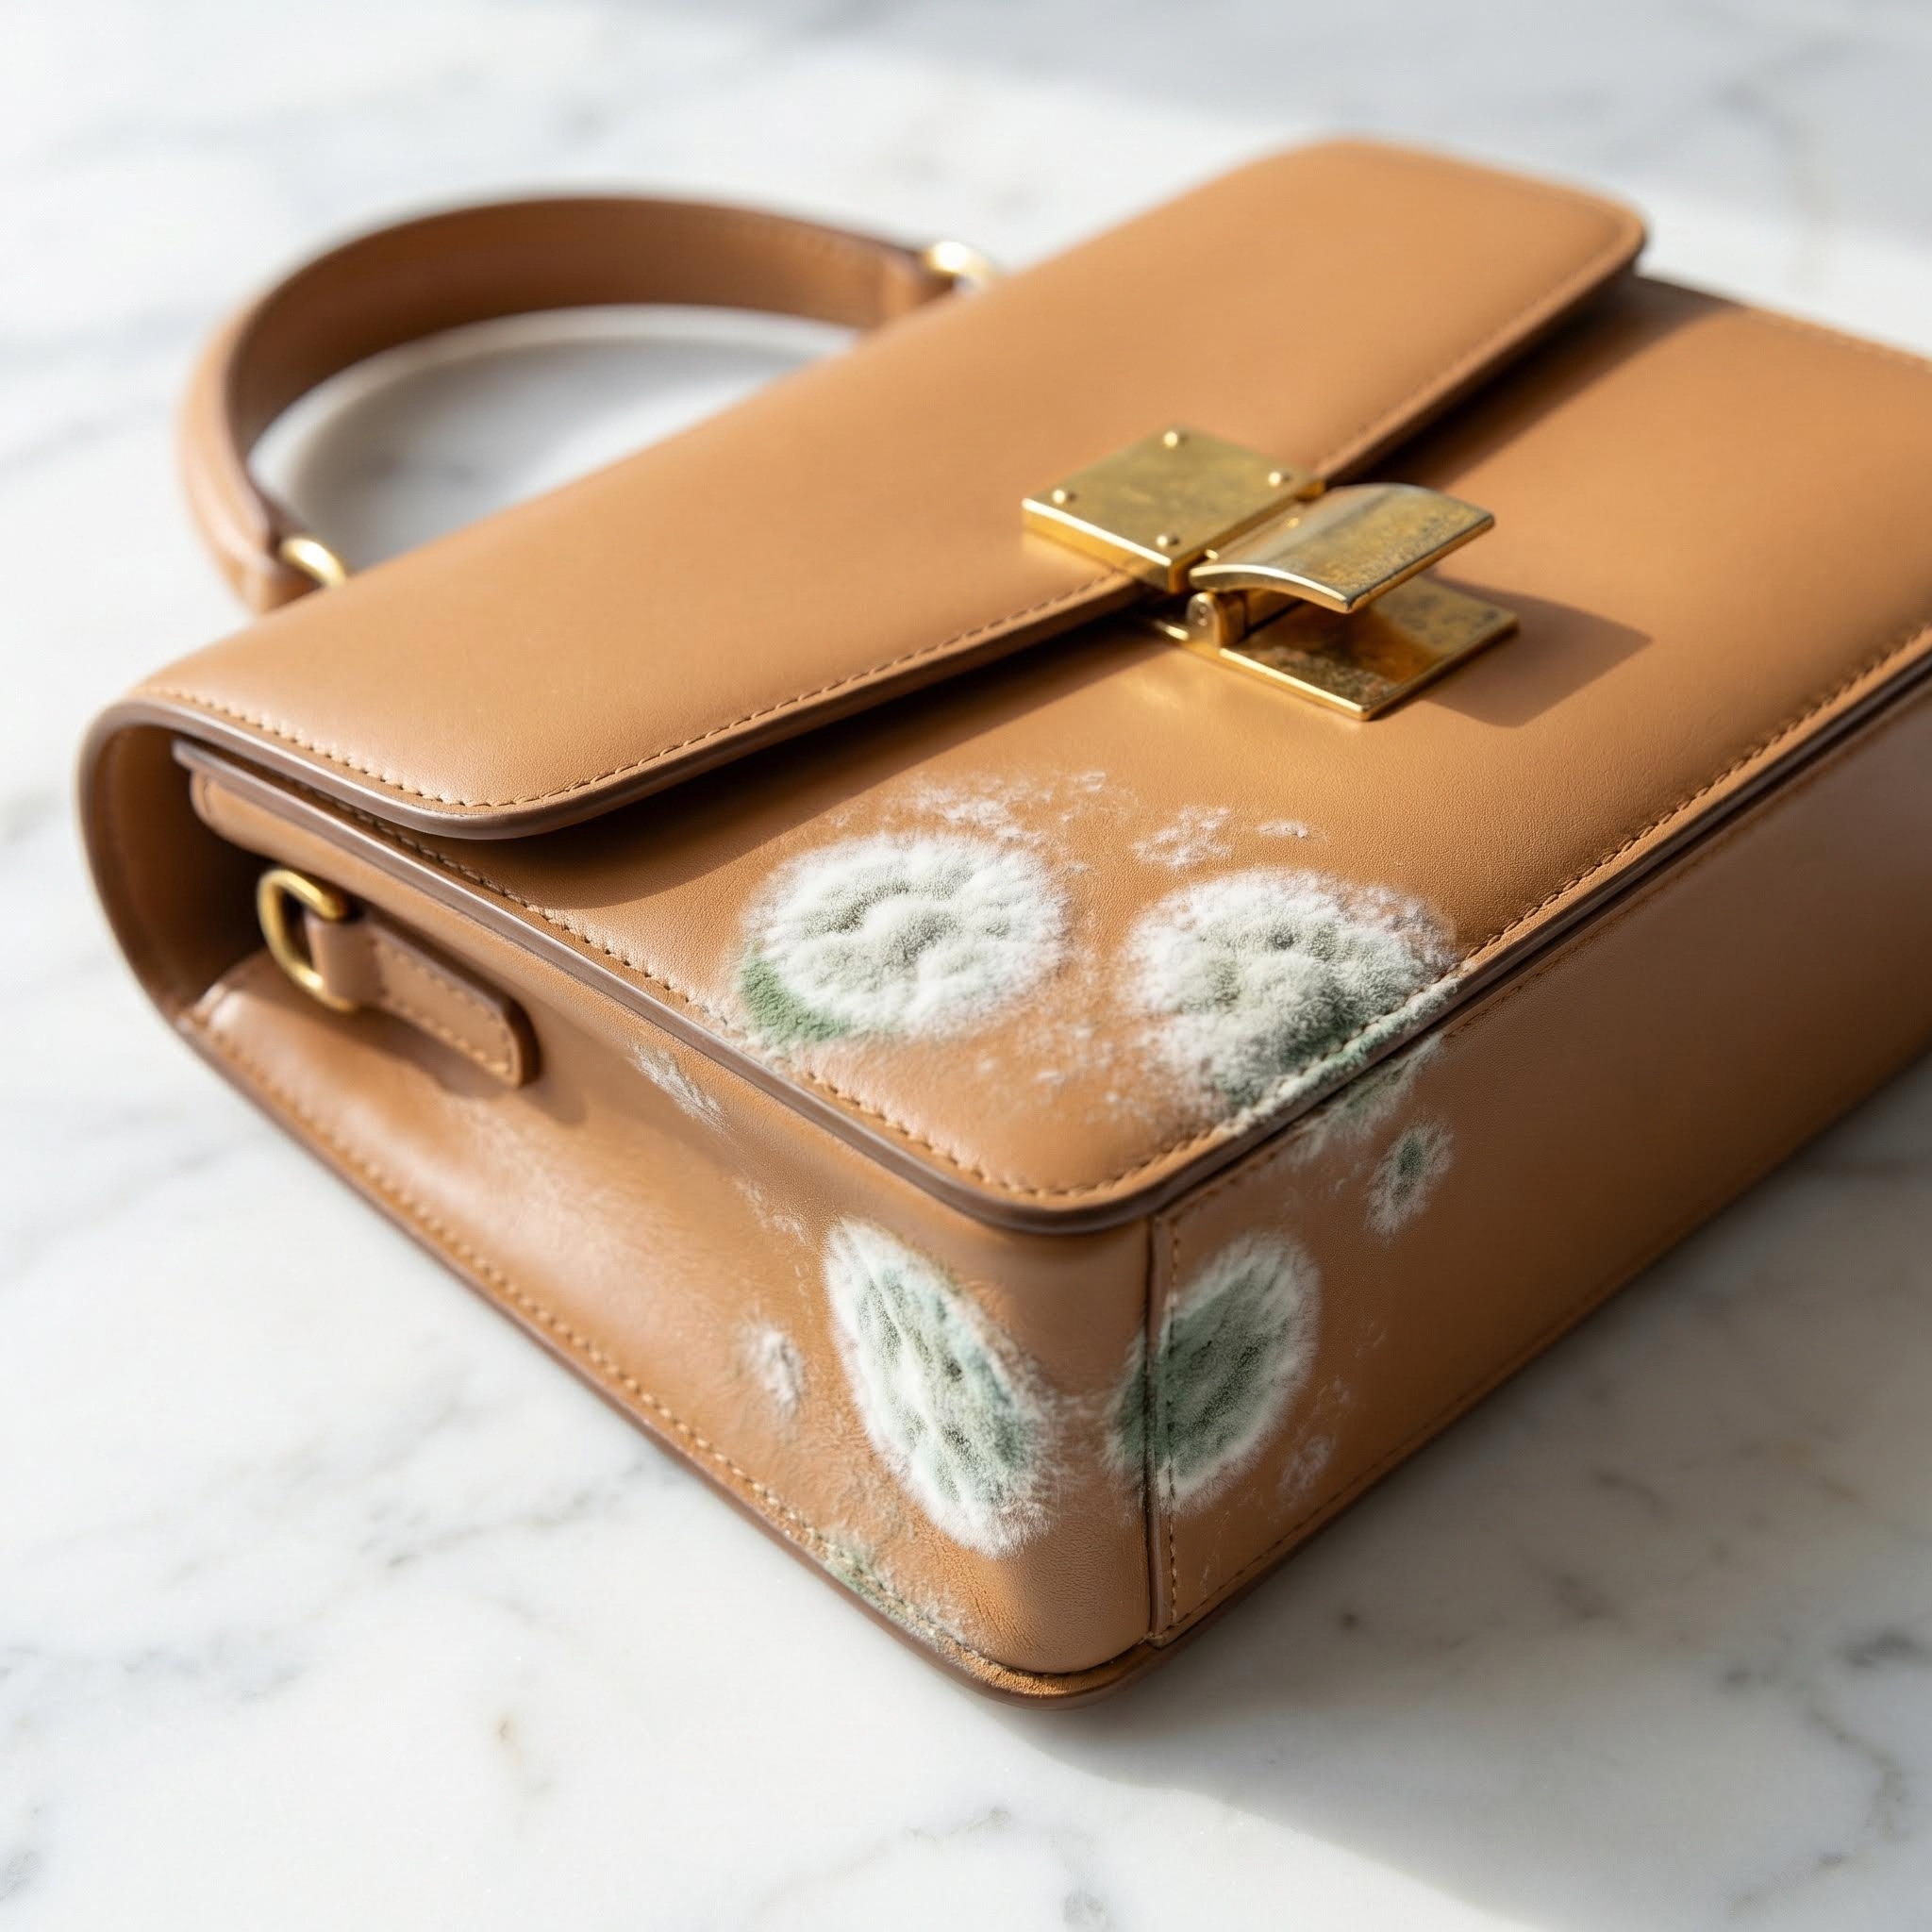
Finding mould on your leather bag is alarming, but don't panic. Most surface mould can be successfully removed at home with the right products and technique. However, some situations require professional help.
DIY Is Appropriate If:
- Surface mould only (fluffy/powdery white, green, or grey)
- Mould appears on one side only (not penetrated through)
- Bag value under SGD $5,000
- Caught within 4 weeks of appearing
- No colour change or staining from mould
- Smooth leather (full-grain, top-grain, calfskin)
- Musty smell is mild
Seek Specialised Help If:
- Mould visible on both sides of leather
- Bag value over SGD $5,000 (Hermès, Chanel, etc.)
- Exotic leather (crocodile, ostrich, python)
- Suede or nubuck (requires specialist products)
- Strong musty smell persisting after surface cleaning
- Dark staining from mould (black, brown discolouration)
- Mould has been there for more than 2 months
- You're uncertain. When in doubt, go professional
Professional Mould Removal Costs in Singapore:
- Light cases: SGD $150-300
- Moderate cases: SGD $300-600
- Severe or exotic leather: SGD $600-1,500
Our philosophy: A well-executed DIY clean saves money and works excellently for fresh, surface mould. Trying DIY on a situation that needs professional care can make things worse and cost more in the end.
Equipment and Products You'll Need
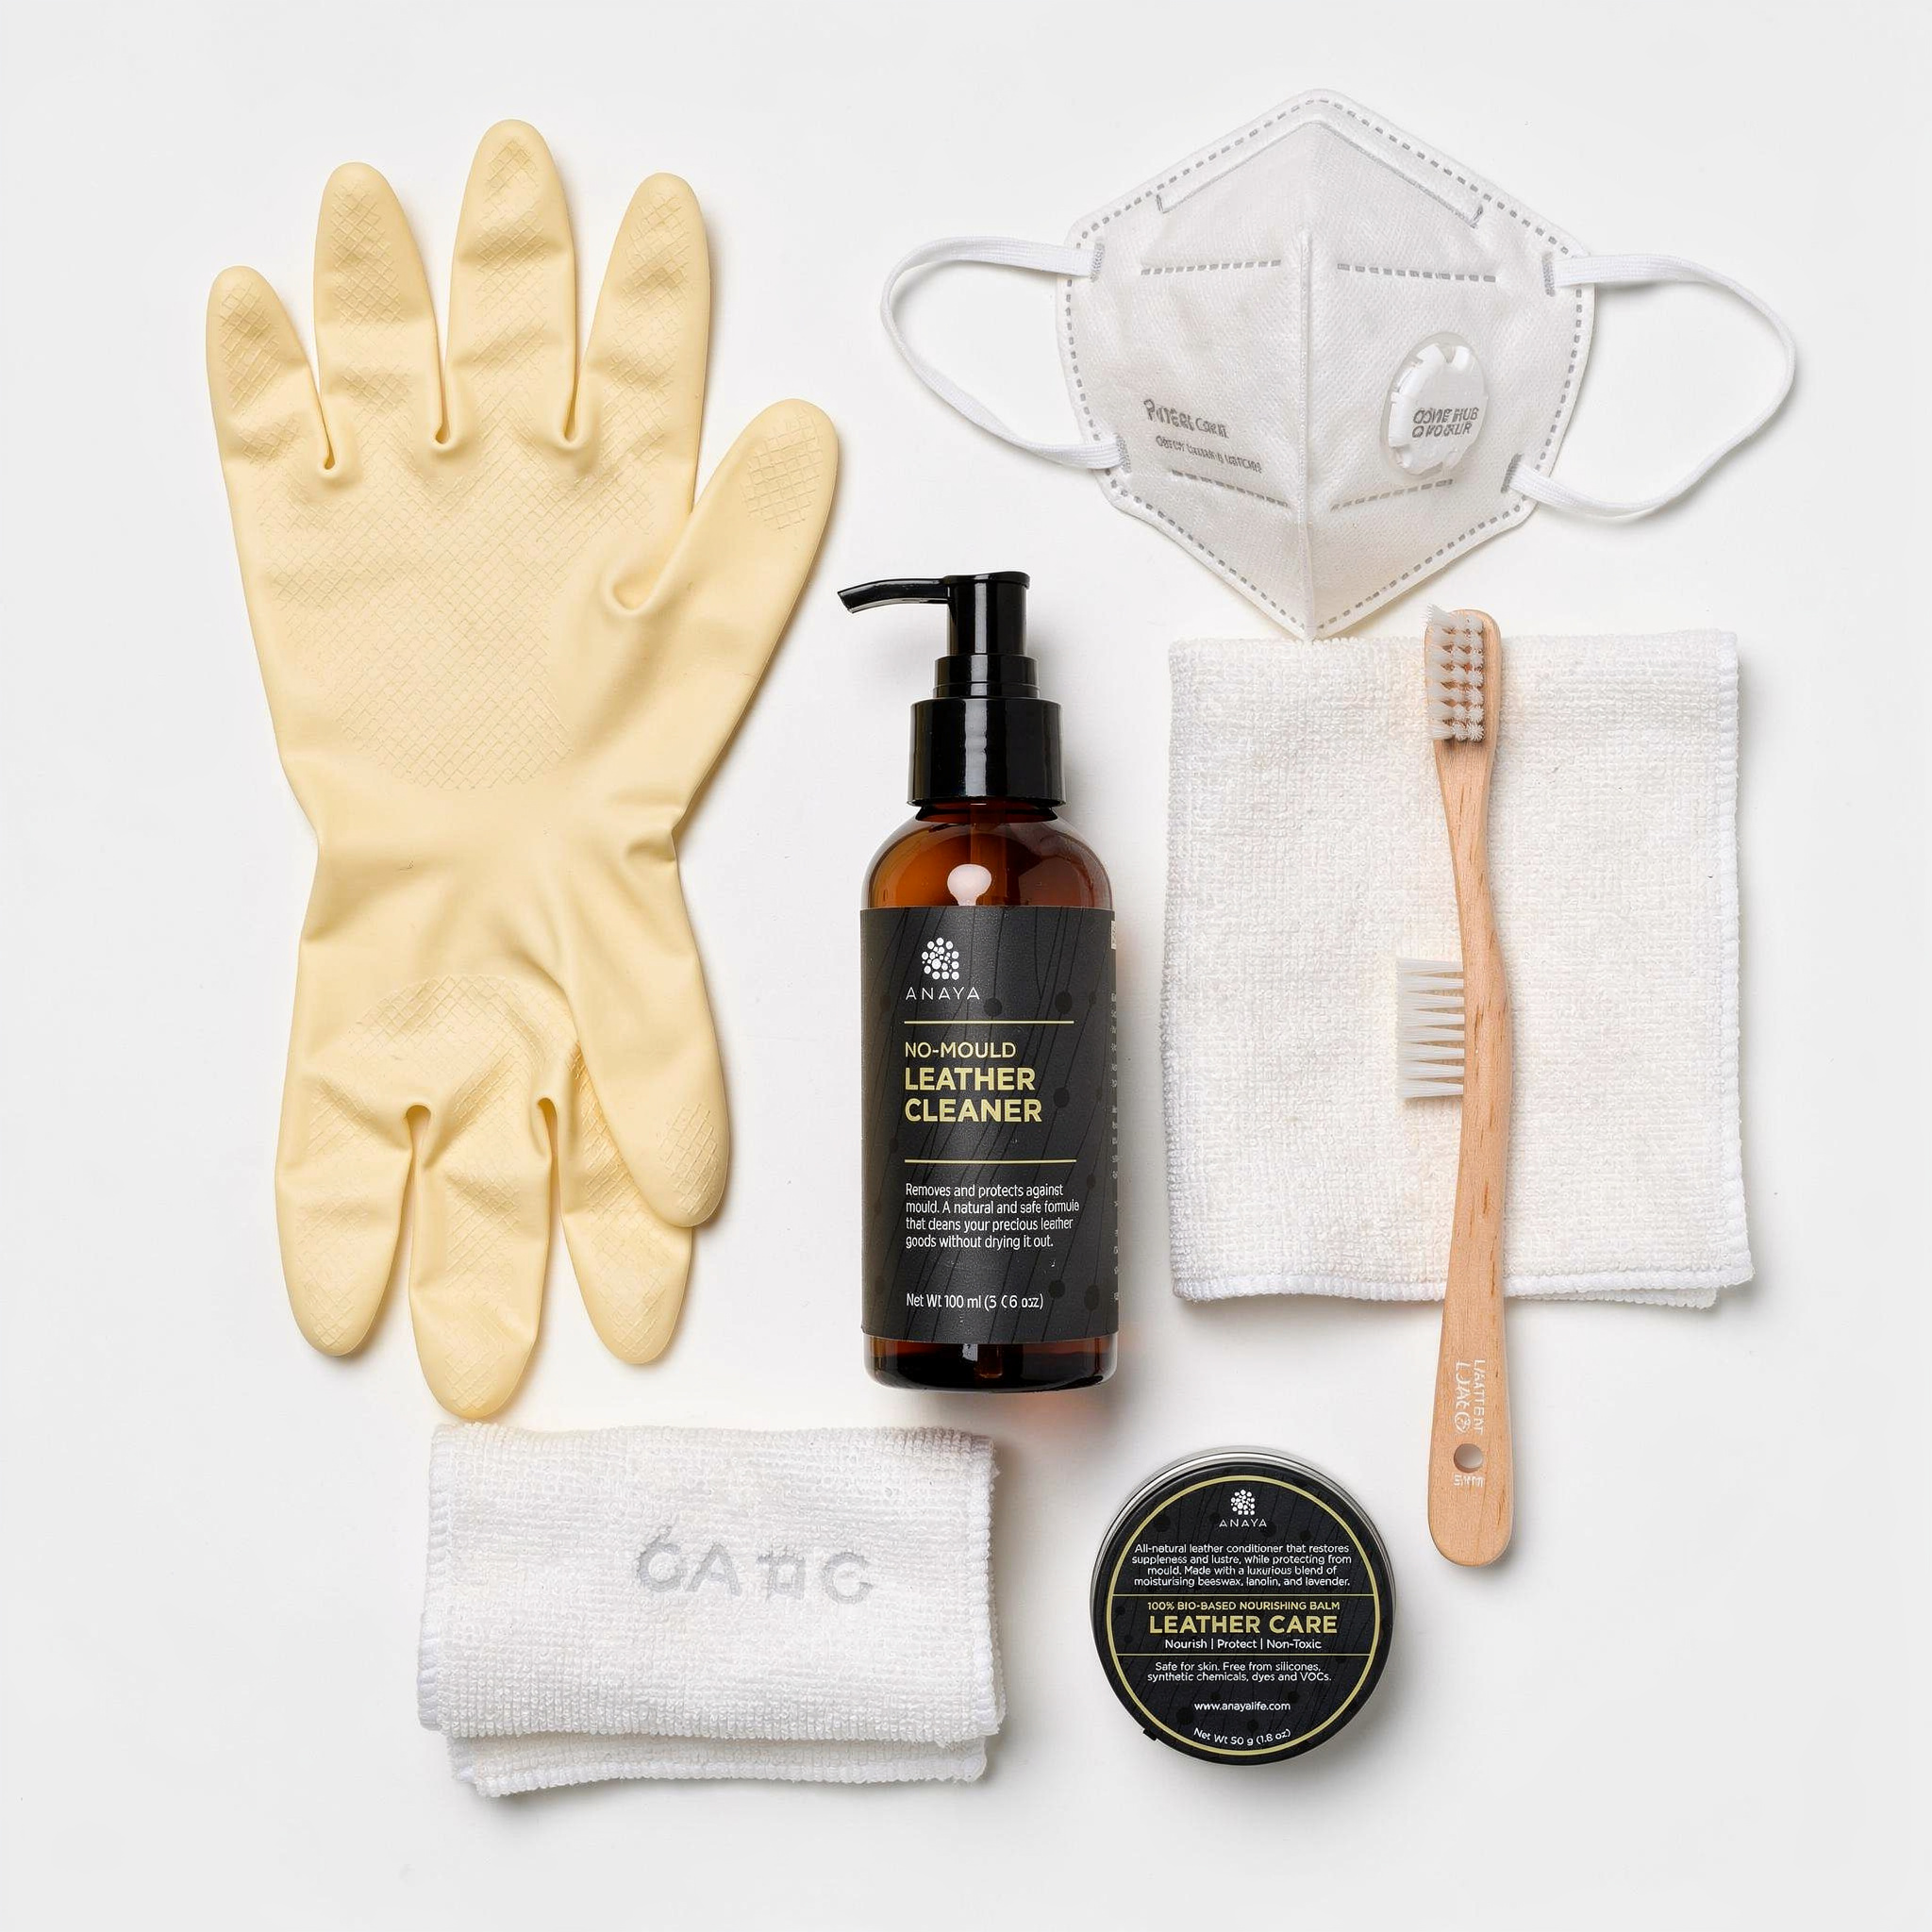
Essential Items
For safety:
- Disposable rubber gloves (1-2 pairs)
- N95 face mask or surgical mask
- Disposable bags for discarding contaminated cloths
For cleaning:
- No-Mould Leather Cleaner (100ml)
- 4-6 clean white microfibre cloths (white shows transfer, helping you monitor progress)
- Soft-bristle brush (an old soft toothbrush works well for crevices)
- Medium-bristle brush for initial dry brushing
For restoration:
- Leather Care (50g)
- 2 additional clean cloths for conditioning
For prevention:
- Anti-Mould Patches (10 patches)
- Breathable cotton dust bag
Time required: 30-45 minutes active work plus 24-48 hours drying
Setting Up Your Workspace
Ideal location:
- Outdoors (balcony or garden) for initial brushing
- Air-conditioned room for cleaning and drying
- Good natural or artificial lighting (to see mould clearly)
- Covered surface (newspaper or old towels)
Why outdoors for brushing: Dry brushing releases mould spores into the air. Doing this outside prevents spreading spores throughout your home, which is particularly important in Singapore's humidity where indoor spores can settle and cause problems elsewhere.
Safety Precautions
Mould is not just a leather problem, it's a health concern. Singapore's tropical mould species (Aspergillus, Penicillium, Cladosporium) can cause respiratory irritation, allergic reactions, and in sensitive individuals, more serious health issues.
Protect Yourself
Always wear gloves:
- Put on before touching mouldy leather
- Don't touch your face while working
- Remove carefully after (peel off from wrist outward)
- Dispose immediately in a sealed bag
Always wear a mask:
- N95 preferred (filters fine particles)
- Surgical mask acceptable
- Avoid breathing over open mouldy areas
- Especially important for the initial brushing step
Protect your home:
- Don't carry a mouldy bag through clean rooms
- Take directly to your workspace (outdoors or well-ventilated area)
- Wash hands thoroughly after cleaning
For people with mould sensitivities or asthma: have someone else do the cleaning if possible. If you must do it, wear an N95 mask and work outdoors, then monitor for any respiratory symptoms after.
Step-by-Step Mould Removal Process
Overview Timeline
- Step 1: Initial dry brushing, 10 minutes (outdoors)
- Step 2: No-Mould Leather Cleaner application, 20 minutes
- Step 3: First drying, 6-12 hours
- Step 4: Assessment and second clean if needed, 20 minutes
- Step 5: Final drying, 4-6 hours
- Step 6: Conditioning, 15 minutes plus 30-60 minutes absorption
- Total active time: 45-65 minutes across 1-2 days
Step 1: Initial Assessment and Dry Brushing
What you're doing: Removing loose mould before wet cleaning. This prevents spreading mould spores into the leather when you add moisture.
How to do it:
- Put on gloves and mask before touching the bag
- Take the bag to an outdoor or well-ventilated space
- In good lighting, examine the entire bag: front, back, base, handles, interior, all pockets
- Note all affected areas (helpful to photograph them for comparison)
- Hold the bag away from you
- Using a medium-bristle brush, gently brush affected areas with short strokes away from your body
- Brush all mouldy areas even if they look clean, since invisible spores may be present
- Don't apply pressure, which pushes mould into the leather grain
- Seal the brush immediately in a plastic bag and discard
- Wipe the bag gently with a dry cloth to remove any remaining loose spores
- Seal the used cloth in a plastic bag and discard
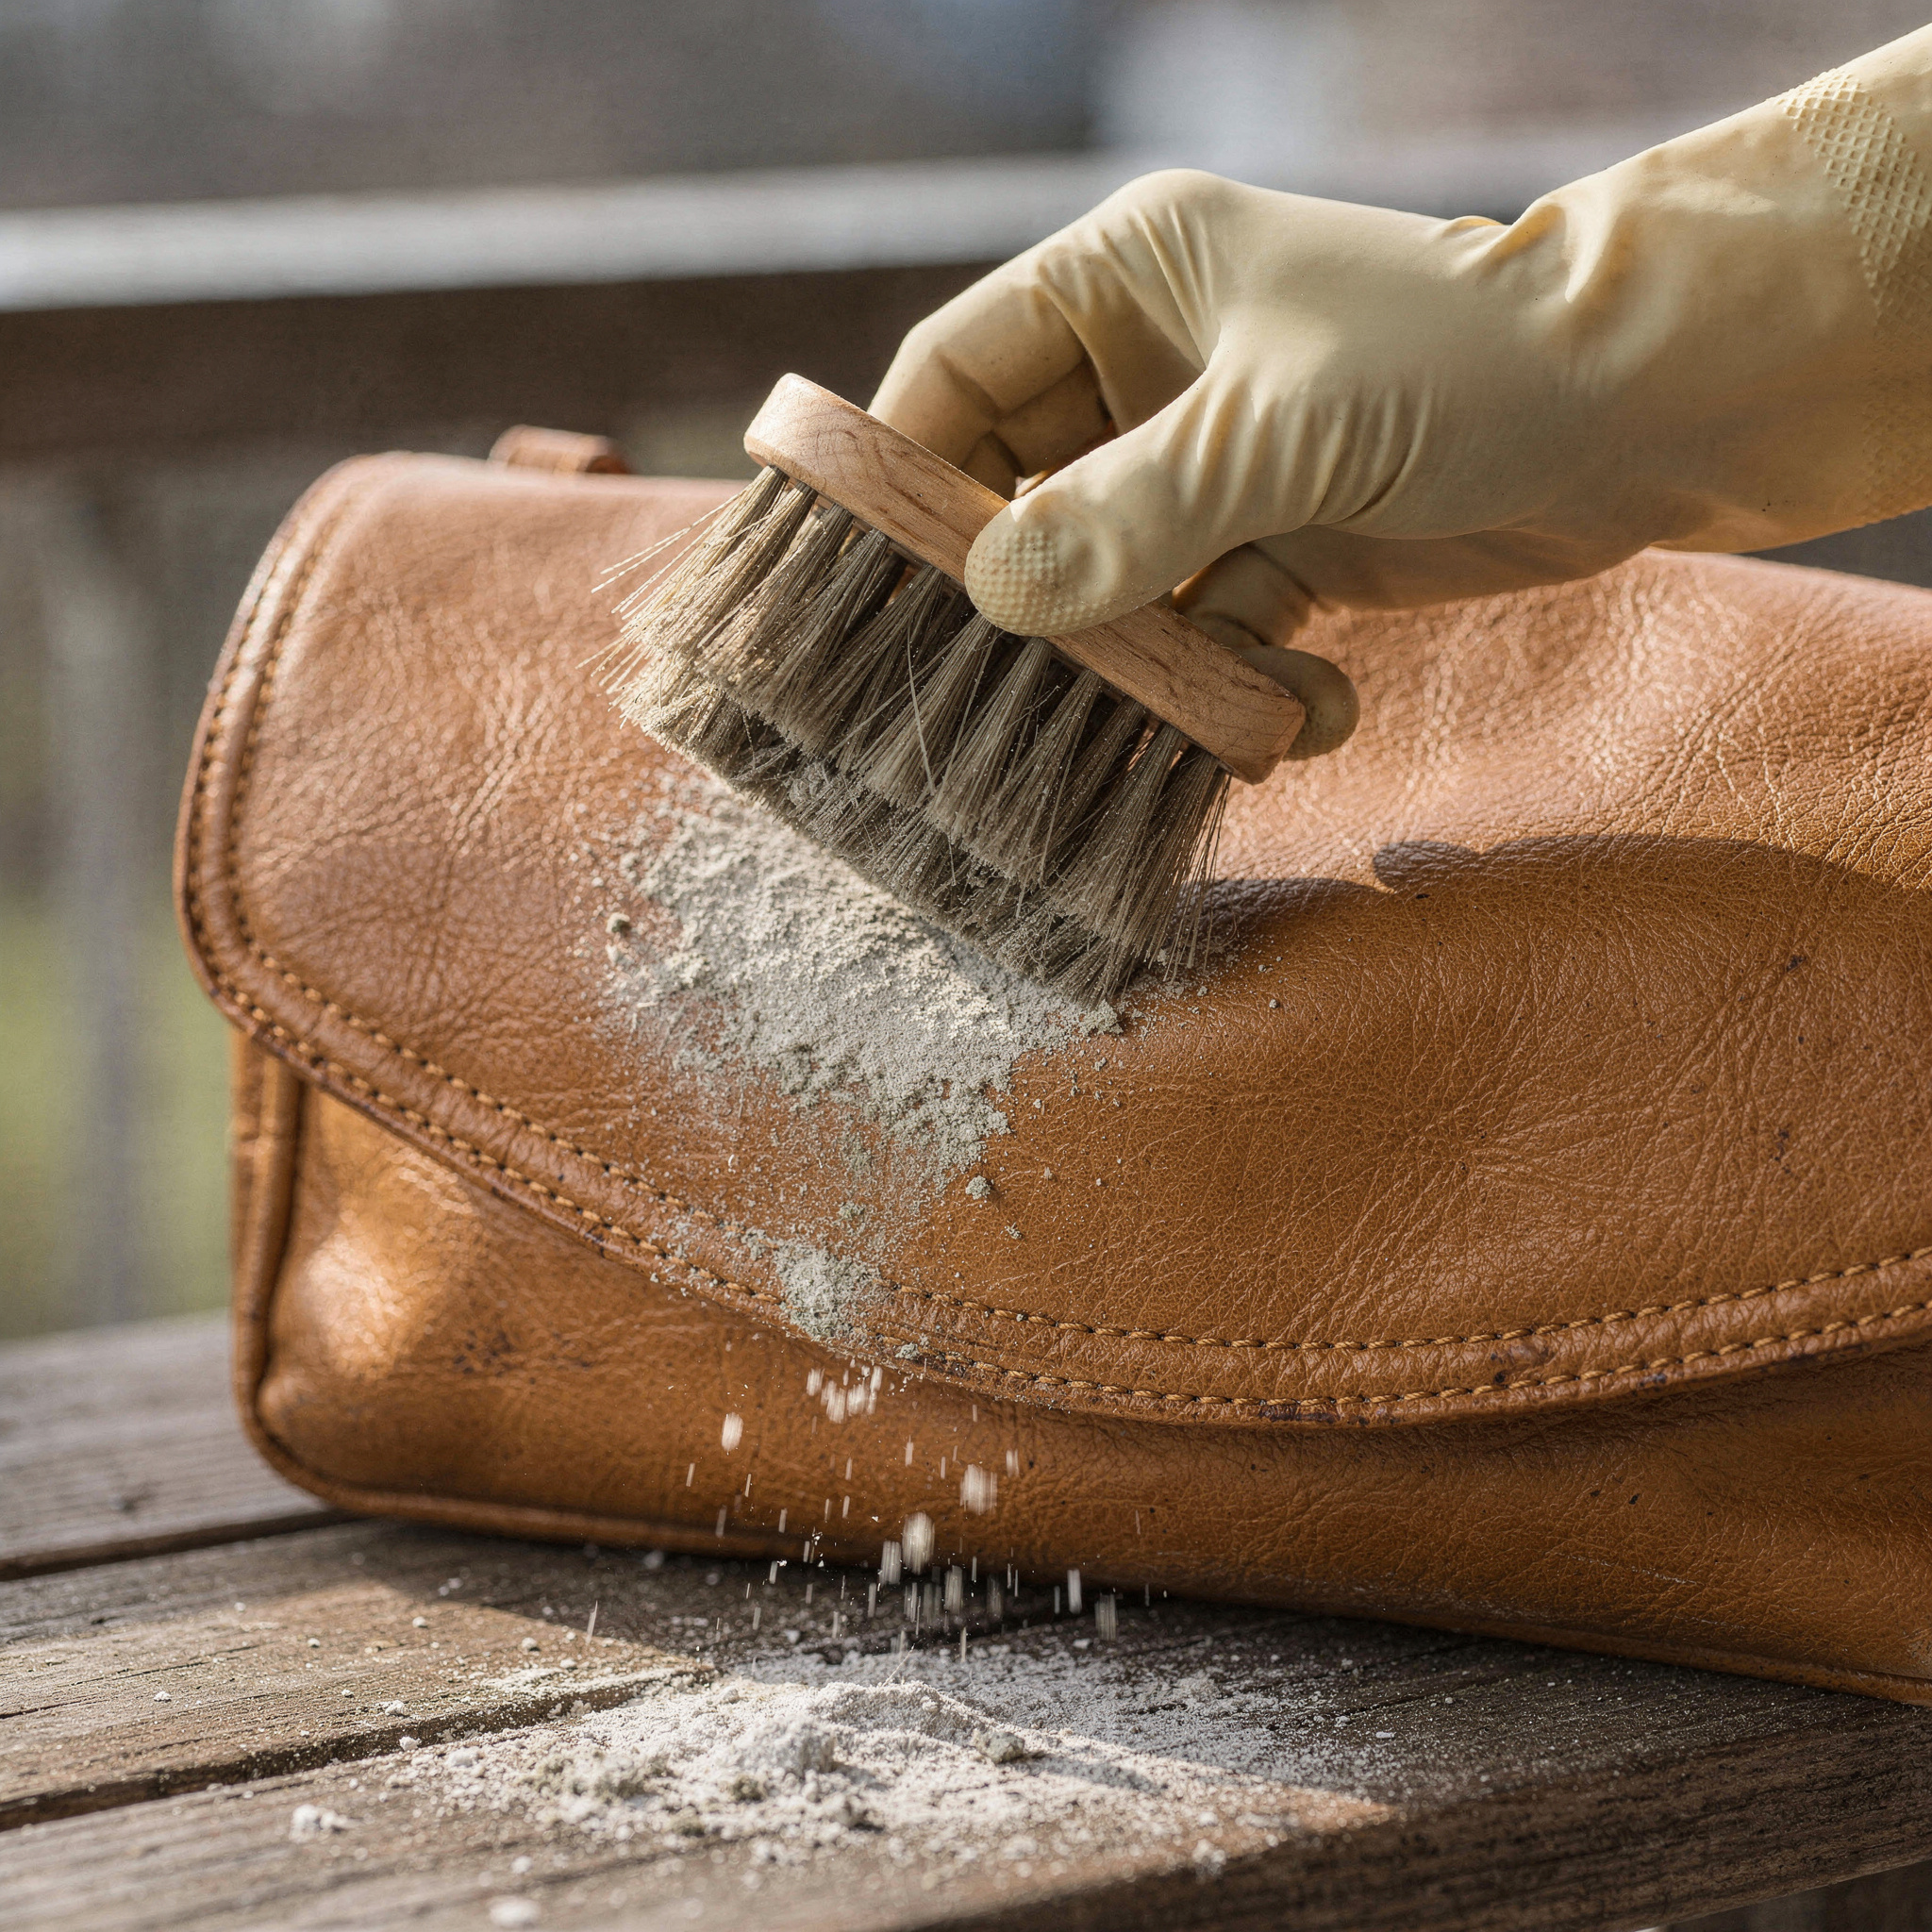
What you should see: loose mould powder or fuzz coming off, the underlying leather becoming more visible, and some areas that may still look discoloured, which is normal at this stage.
Common error: Many people skip this step and go straight to wet cleaning. This pushes loose mould spores deeper into the leather and can spread them across the bag during wiping.
Step 2: Application of No-Mould Leather Cleaner
What you're doing: Using a pH-balanced, antifungal cleaner to kill remaining mould spores and remove mould from the leather surface.
Why No-Mould Leather Cleaner:
- Contains witch hazel, which has natural antifungal properties
- pH-balanced (5.5-6.5), safe for leather's natural pH
- Does not dry out leather like alcohol-based alternatives
- Specifically formulated for Singapore's mould strains
- Safe for most smooth leathers (calfskin, cowhide, pigskin)
Not suitable for: suede, nubuck, aniline leather
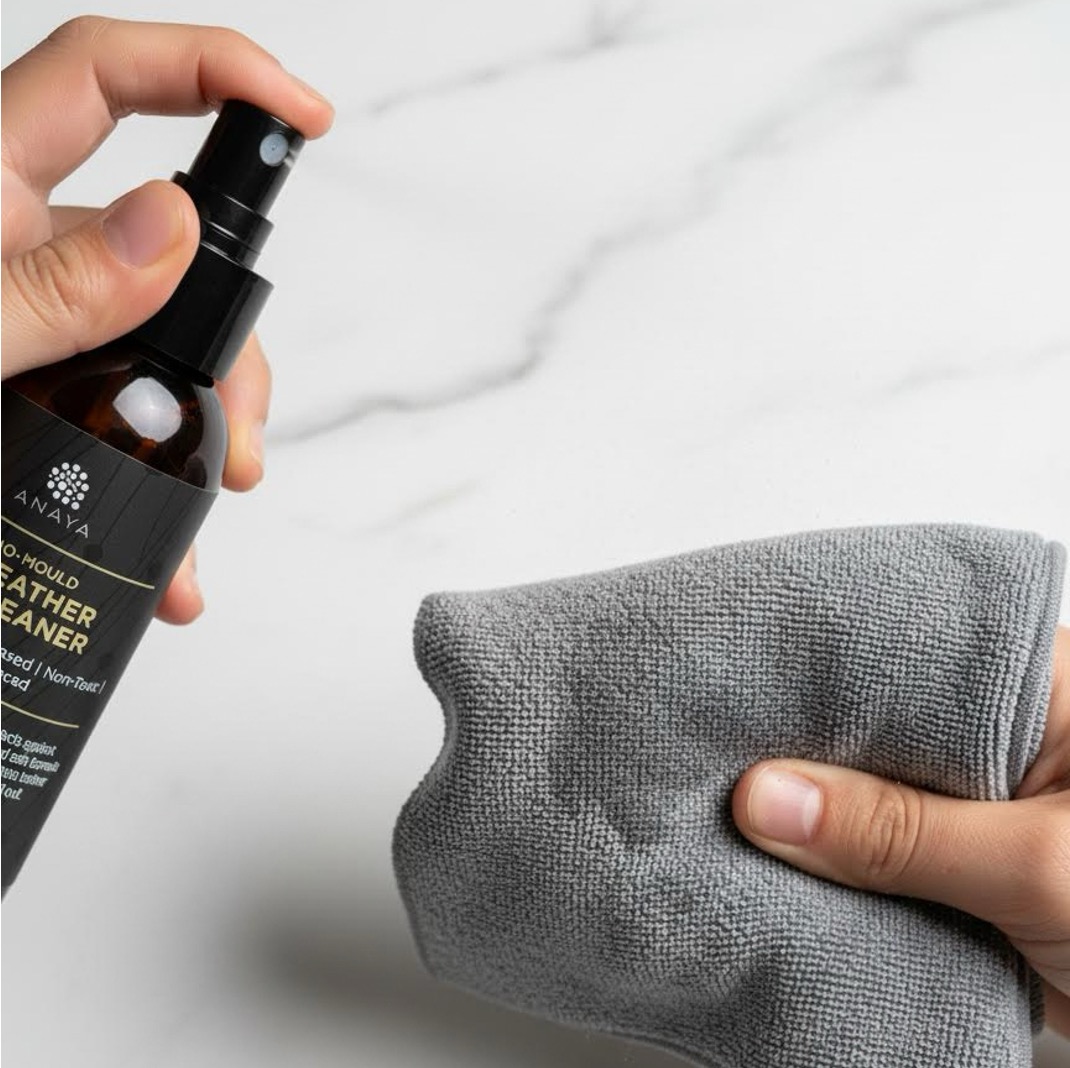
Sub-step A: Prepare your cloth
- Lay a clean white microfibre cloth flat
- Spray No-Mould Leather Cleaner onto the cloth, not directly onto the bag
- The cloth should be damp but not saturated (3-4 sprays for a medium cloth)
- Fold the cloth in quarters so you have multiple clean surfaces to rotate to
Sub-step B: Clean affected areas
- Starting with the most heavily moulded areas, wipe with the damp cloth
- Use circular motions with light to medium pressure
- After 3-4 wipes, rotate the cloth to a fresh section to prevent spreading mould
- Continue until all visible mould is addressed
- When the cloth is grey or black, replace it with a fresh cloth
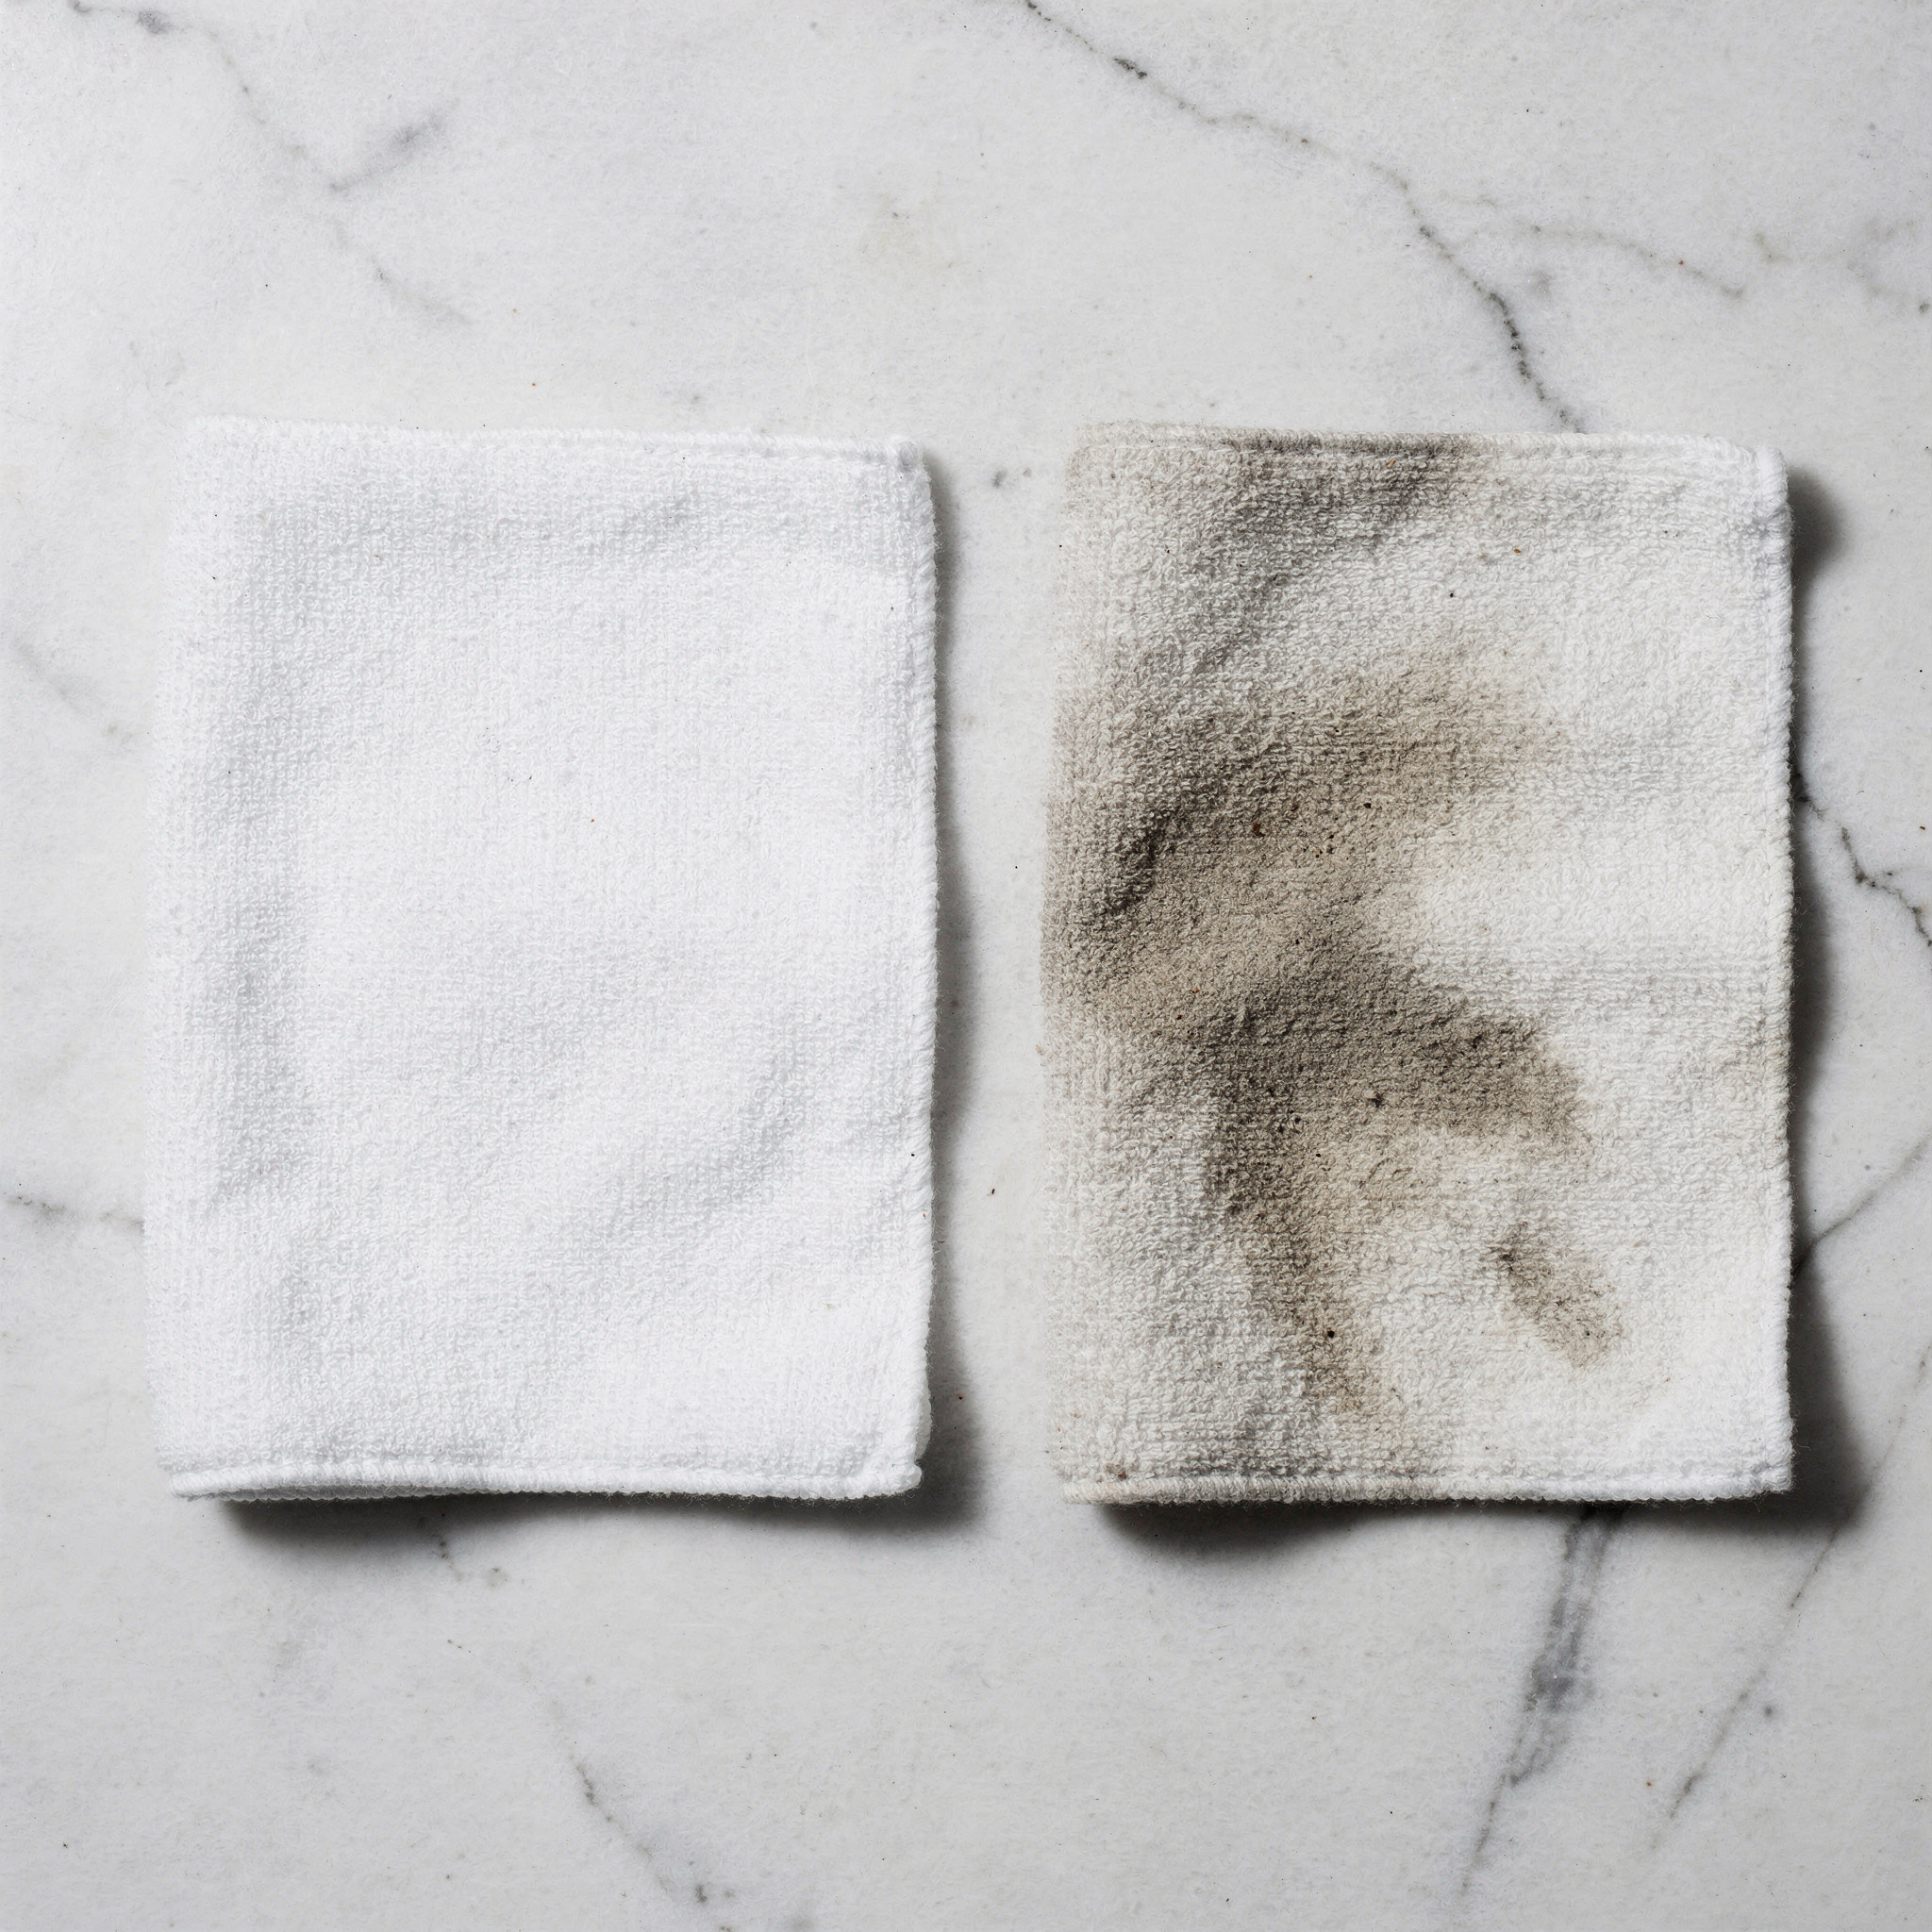
Sub-step C: Clean the entire bag
- Even areas without visible mould may have invisible spores
- Wipe the entire exterior with a fresh section of cloth
- Pay extra attention to base corners (mould starts here), handle attachment points, zipper areas, and any seam lines
- For crevices, use a soft toothbrush dipped lightly in cleaner and work gently
- For the interior, spray the cloth lightly and wipe the lining carefully
What you should see: the cloth picking up grey or brown residue, the leather surface appearing cleaner, colour slightly darker than normal from moisture (this will lighten when dry), and the mould fuzz gone.
How long this step takes: small clutch 10 minutes, medium handbag 15-20 minutes, large tote 20-25 minutes.
Step 3: First Drying Period
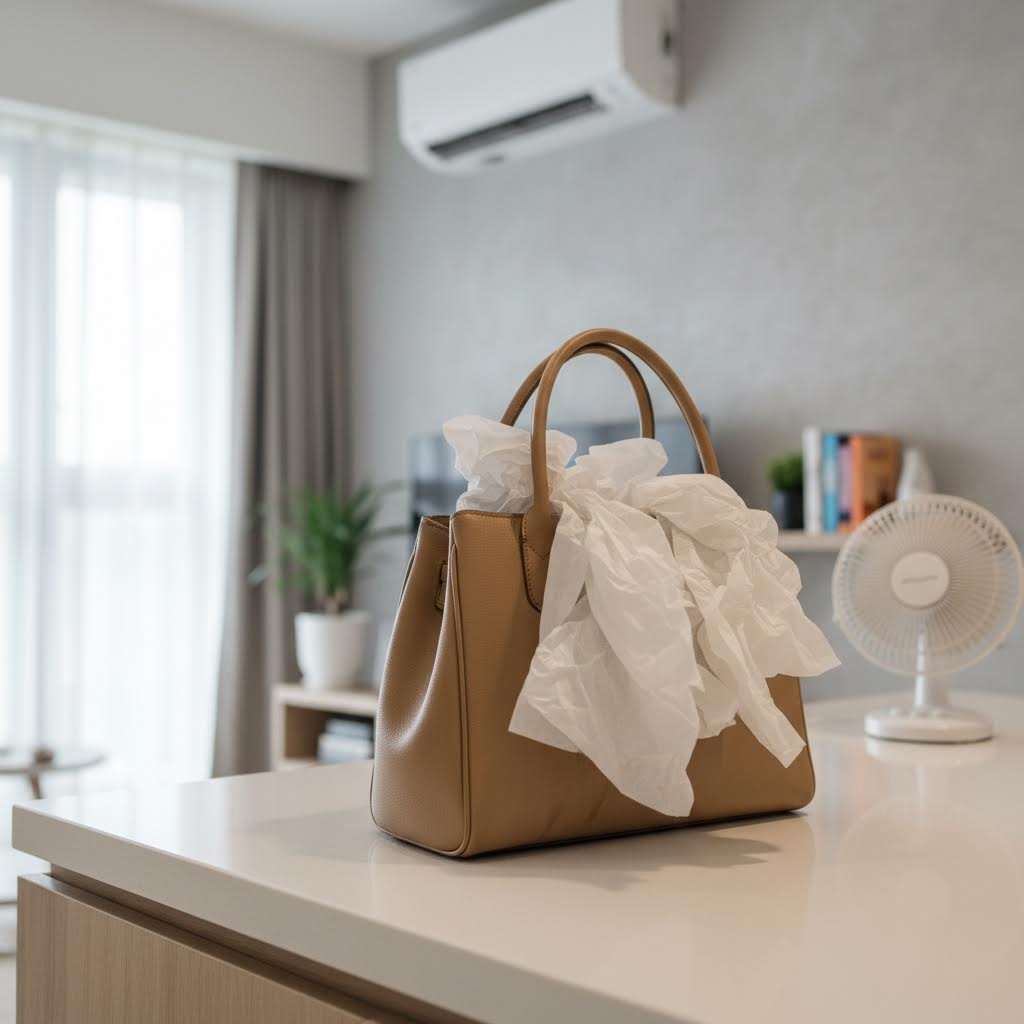
What you're doing: Allowing moisture from cleaning to evaporate completely. Skipping or rushing this step is a major mistake. Wet leather in Singapore's humidity means mould re-establishment.
How to do it:
- Find a clean surface in an air-conditioned room
- Stuff the bag with acid-free tissue paper or clean newspaper to maintain shape and absorb internal moisture
- Leave zippers and clasps open to allow interior airflow
- Position away from direct sunlight (fades leather), air-con vents blowing directly at the bag (causes uneven drying), and heat sources
- Allow to dry for minimum 6 hours, ideally overnight
Check for dryness: the leather should feel room temperature, not cool, since coolness means moisture is still present. Touch seams and handles, which dry last. Check the interior lining feels dry.
If leather is still damp after 6 hours: Singapore humidity can slow drying. Run the air-conditioner, add a small fan for air circulation (not pointed directly at the bag), and give it another 6 hours before proceeding.
Do not use: a hairdryer (damages leather and causes cracking), direct sunlight (fades and dries out leather unevenly), or a clothes dryer (destroys leather).
Step 4: Assessment and Second Clean (If Needed)
What you're doing: Checking results and deciding if another clean is needed.
Inspect in good lighting: look for any remaining white or grey patches, check under flap openings and in corners, and smell the bag for any remaining musty odour.
All mould gone, no smell: proceed directly to Step 5.
Some faint discolouration remaining: repeat Step 2 once more, use slightly more product on the cloth, and allow to dry fully again before conditioning.
Strong musty smell persisting: check the interior more thoroughly. Mould may be in the lining, so clean the interior again. If the smell continues after a second clean, consider professional assessment.
Remaining dark stains (brown or black): this may be permanent mould staining. Conditioning will not remove it, and professional colour restoration may help.
Step 5: Conditioning with Leather Care
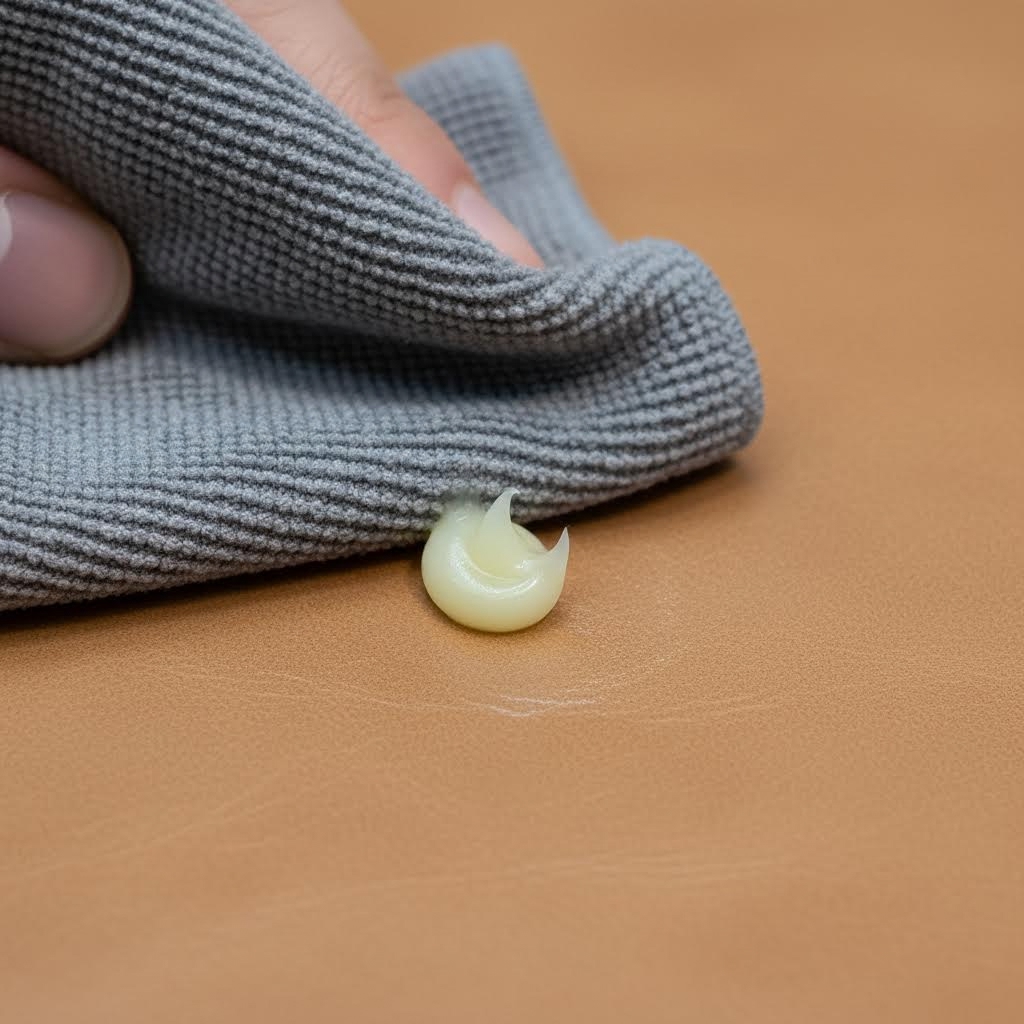
What you're doing: Restoring the leather's natural oils and creating a protective barrier. Mould cleaning removes some of leather's natural moisture. Conditioning replenishes this and creates a surface that's less hospitable to future mould growth.
Why Leather Care:
- Contains beeswax, which creates a protective antimicrobial surface barrier
- Lanolin restores leather's natural suppleness
- Lavender essential oil adds antimicrobial properties
- Natural ingredients with no harsh chemicals that could further damage mould-affected leather
- One treatment lasts 3 months
How to do it:
- Confirm the bag is completely dry. This is critical, since conditioning damp leather traps moisture
- Take a small amount of Leather Care on a clean cloth (pea-sized for a small section)
- Work into the leather using circular motions
- Apply a thin, even layer to the entire exterior
- Use extra on previously moulded areas (the leather is drier there), handles and corners (high-wear areas), and the base
- Allow to absorb for 30-60 minutes, longer in humid conditions
- Buff firmly with a clean dry cloth using circular motions
- The bag should look nourished, slightly deeper in colour, with a gentle sheen
- Allow to sit for another hour before storage or use
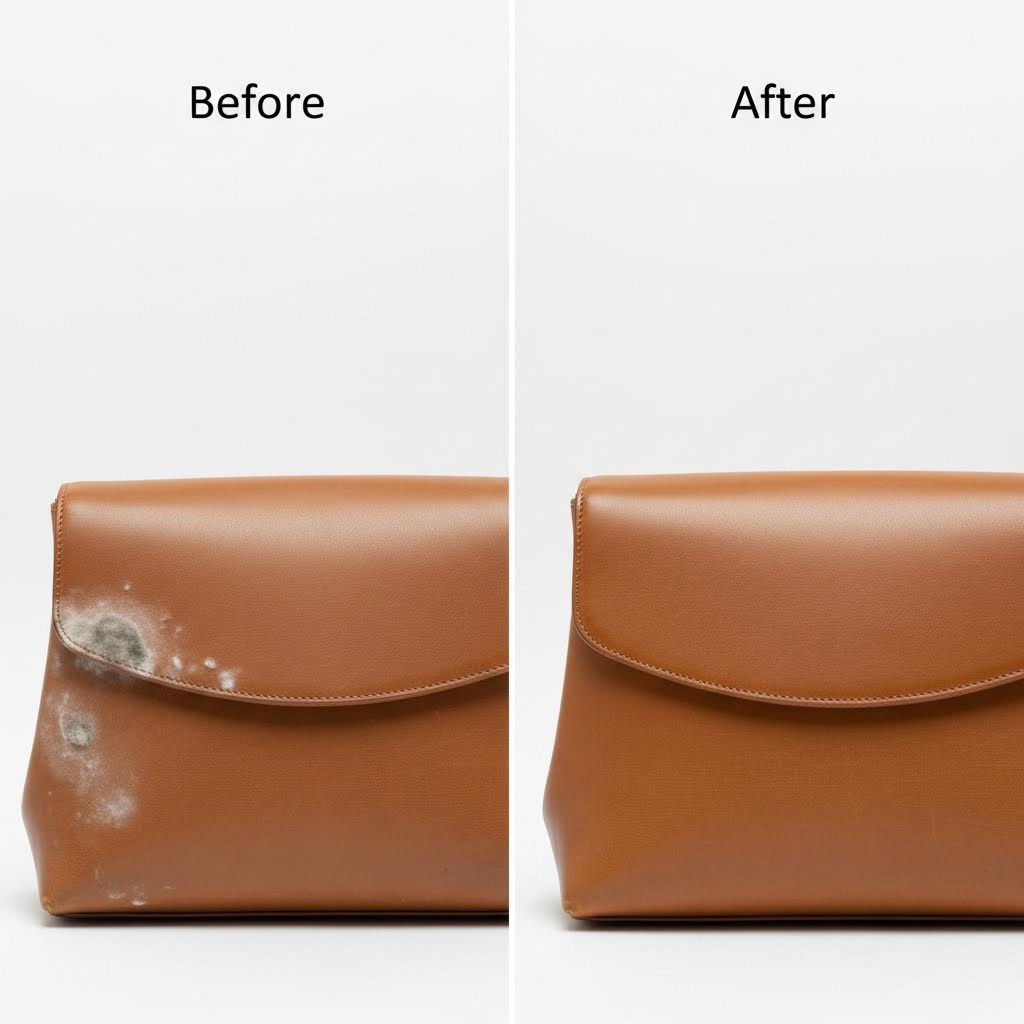
How much to use: small clutch, a grain-of-rice amount per section. Medium handbag, pea-sized per section. Large tote, slightly more applied in sections. Less is always better, since you can reapply but cannot remove excess.
Step 6: Storage with Anti-Mould Protection
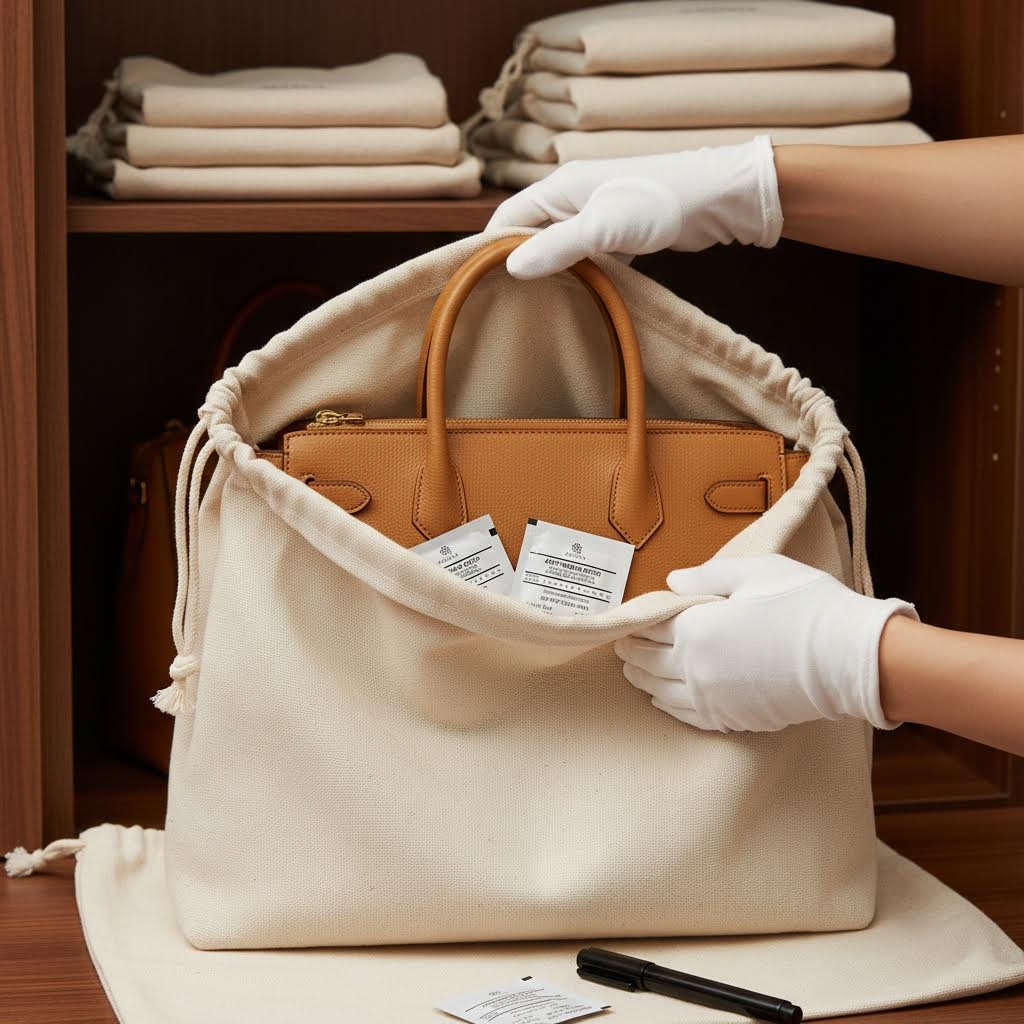
What you're doing: Creating a protected storage environment that prevents mould recurrence.
Why this step is non-negotiable: Cleaned leather in Singapore without anti-mould protection will develop mould again. Mould spores are always present in Singapore's air. Without prevention, the cycle repeats.
How to do it:
- Place 2 anti-mould patches inside a breathable dust bag
- Patches can be placed loosely and can safely touch the leather
- Gently place the conditioned bag inside the dust bag
- Tie or close the dust bag loosely
- Store in an enclosed wardrobe, which limits spore exposure while allowing some breathability
After a mould incident, use enhanced protection: 3-4 patches instead of 2 for the first 3 months, weekly checks for the first month, bi-weekly for the second and third month, then back to standard 2 patches after 3 clean months.
Mark your patches: use a permanent marker to write the start date on each patch, and replace every 1-2 months rather than waiting for the standard 3-month replacement period.
Natural vs. Product-Based Methods: Honest Comparison
Many guides suggest DIY home remedies. Here's an honest look at how they compare to purpose-made products.
| Method | Effectiveness | Safe for Leather | Singapore Mould Strains | Risk of Damage |
|---|---|---|---|---|
| No-Mould Leather Cleaner | Excellent | Yes | Formulated for these | Very Low |
| White vinegar + water | Moderate | Risky | Not specifically | Medium |
| Rubbing alcohol | Moderate | No | Dries out leather | Very High |
| Saddle soap | Low | Some leathers only | Not antimould | Medium |
| Baby wipes | Very Low | No | Wrong pH | High |
| Tea tree oil (diluted) | Moderate | Test first | Partial | Medium |
Why DIY Home Remedies Are Risky
White vinegar has mild antifungal properties and works for light mould, but its acid content (pH around 2.5) can damage leather's pH balance and cause discolouration, especially on coloured leather. It should be heavily diluted at 1:10 minimum, and even then, test first.
Rubbing alcohol kills mould effectively but also strips natural oils, causing leather to dry out severely and crack over time. It can strip colour from dyed leathers and is not recommended for any leather care.
Baby wipes have insufficient mould-killing properties and contain alcohol, surfactants and fragrances that damage leather. The pH is not balanced for leather, giving a false sense of security: they appear to clean the surface whilst damaging the leather.
Our recommendation: a 100ml bottle of No-Mould Leather Cleaner treats 15-20 items. The cost of using a purpose-made, tested product is minimal compared to the risk of leather damage from DIY solutions.
Before and After: What to Expect
Realistic Outcomes by Mould Severity
Early-stage mould (discovered within 2 weeks)
- Success rate: 95-99%
- Mould completely gone, leather may look slightly better than before thanks to conditioning
- Results visible after Step 3
- Nothing remains
Mid-stage mould (2-6 weeks old)
- Success rate: 80-90%
- Mould removed, possible light discolouration remaining
- 2-3 cleaning rounds over 2-3 days
- Slight colour variation may remain, often fading with repeated conditioning
Advanced mould (6+ weeks, or penetrated leather)
- Success rate for DIY: 40-60%, professional recommended
- Surface mould removed but staining may remain
- Permanent colour change and possible texture change
Colour and Texture Changes After Treatment
Normal after cleaning: leather appears darker immediately from cleaning moisture then lightens when dry. Slight sheen change resolves with conditioning. Very slight softening is actually positive and indicates the conditioning is working.
Concerning after cleaning: dark spots that don't lighten when dry may be permanent mould staining. Leather that feels rough or different in texture may be damaged. Dramatic colour change may be dye damage. Peeling or flaking needs professional help immediately.
7 Common Mistakes to Avoid
Mistake 1: Spraying cleaner directly onto leather
This causes over-application in one spot, uneven cleaning and possible water marking. Always spray onto the cloth first, then apply to leather.
Mistake 2: Scrubbing hard to remove stubborn mould
This pushes mould deeper into the leather grain and can damage the surface. Use gentle circular motions and multiple passes with fresh cloth sections.
Mistake 3: Drying with a hairdryer or direct sun
Rapid moisture loss causes leather to dry unevenly and crack. Air dry slowly in an air-conditioned room for 6-12 hours minimum.
Mistake 4: Skipping the conditioning step
Cleaned leather without conditioning is drier and more vulnerable to new mould. Always condition after cleaning, since it's what closes the process.
Mistake 5: Storing without anti-mould patches after treatment
Mould returns within weeks in Singapore's humid air. Use 3-4 patches after a mould incident, double the normal amount.
Mistake 6: Only cleaning visible mould spots
Invisible mould spores in other areas continue to spread. Clean the entire bag, not just affected areas.
Mistake 7: Using the same cloth section repeatedly
This redistributes mould across the leather surface. Rotate to a clean section every 3-4 wipes and replace the cloth when it turns grey.
Troubleshooting Guide
Mould won't come off after multiple cleans
The mould has penetrated the leather fibres rather than sitting on the surface, so surface cleaning won't reach it. Try one more round with slightly more product. If it's still there, professional deep cleaning is required, with a success rate of 60-75% and an estimated cost of SGD $300-600.
Leather colour changed after cleaning
Darker but drying down slowly: this is normal. Moisture from cleaning makes leather appear darker. Give it 24-48 hours to fully dry and it should return to normal or close to it. Condition well.
Dark spots that don't lighten after 48 hours: this is mould staining, where pigment has been damaged by mould enzymes. Conditioning may reduce the appearance slightly. Professional colour restoration runs SGD $200-500. Prevention means acting faster next time, since mould causes permanent staining at 3-4 weeks.
Leather appears lighter or faded: possible dye removal from the wrong product or over-application. Condition immediately to help, then seek professional colour restoration.
Musty smell persists after cleaning
The mould is likely in the lining, interior pockets, or within the leather structure. Check the interior lining thoroughly in good light, check all pockets including internal zipped ones, and smell the lining specifically. If the lining smells, clean it with a lightly dampened cloth, being very gentle with fabric linings. Leave the bag open in an air-conditioned room for 48-72 hours.
Why smell persists: Singapore's mould species produce mycotoxins that can remain in leather even after mould is physically removed. The antimicrobial beeswax in Leather Care helps address this over time.
Mould returned within 2 weeks
This indicates insufficient prevention measures or a storage environment that is too humid. Clean again using the full process, double the anti-mould patches to 4 instead of 2, and review the storage location. Is it air-conditioned? Is the wardrobe near an external wall? Is there any water damage or moisture source? Longer term, add an electric dehumidifier to the storage area, check the wardrobe for water ingress, and consider moving the storage location.
White residue after conditioning
This is over-application of Leather Care. Buff more vigorously with a clean dry cloth using circular motions with firm pressure. If it's still present after buffing, use a slightly damp cloth, wipe gently and re-buff. Use less product next time, since pea-sized is usually enough per section.
Prevention After Cleaning
Cleaning mould is the beginning, not the end. Prevention in Singapore requires ongoing care.
Immediate Post-Treatment Protocol (First 3 Months)
Month 1: check the bag weekly, do a sniff test at each check (mustiness means act immediately), keep 3-4 anti-mould patches in the dust bag, and ensure storage stays enclosed.
Month 2: check bi-weekly, replace all patches at the end of the month, and re-condition if the leather feels dry.
Month 3: check bi-weekly. If there's no recurrence, return to the standard protocol.
After 3 clean months: return to standard 2 patches per bag, monthly inspection, and quarterly cleaning and conditioning.
Ongoing Singapore Leather Care Schedule
| Frequency | Task |
|---|---|
| After every use | Wipe down with dry cloth |
| Monthly | Visual inspection and smell check |
| Every 1-3 months | Replace anti-mould patches |
| Every 3 months | Clean with No-Mould Leather Cleaner |
| Every 3 months | Condition with Leather Care |
| November (pre-monsoon) | Replace all patches, condition all bags |
Mould Removal at a Glance
Step 1: Brush. Dry brush outdoors with mask and gloves.
Step 2: Clean. No-Mould Leather Cleaner on cloth, entire bag.
Step 3: Dry. Air-con room, 6-12 hours minimum.
Step 4: Assess. Check results, repeat Steps 2-3 if needed.
Step 5: Condition. Leather Care, buff after 30-60 mins.
Step 6: Protect. 3-4 anti-mould patches in dust bag, store enclosed.
Get the Complete Mould Removal and Prevention Kit
Everything you need to clean mould and prevent it returning:
Or get all three together in the Anti-Mould Leather Care Kit.
Need help with a specific bag? WhatsApp us a photo and we'll advise whether DIY or professional is right for you, or email hello@gtclife.com.